Making Cassandra's Powers FX in Deadpool & Wolverine
Framestore’s Global Head of Creature Development, Markus Schmidt, provides an in-depth look into the process of creating the unique Cassandra's Power FX for Deadpool & Wolverine.
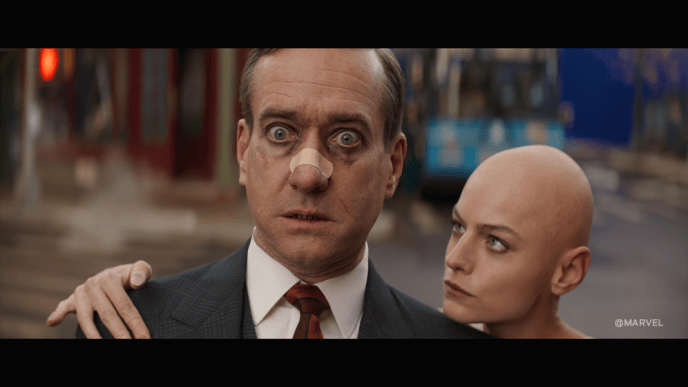
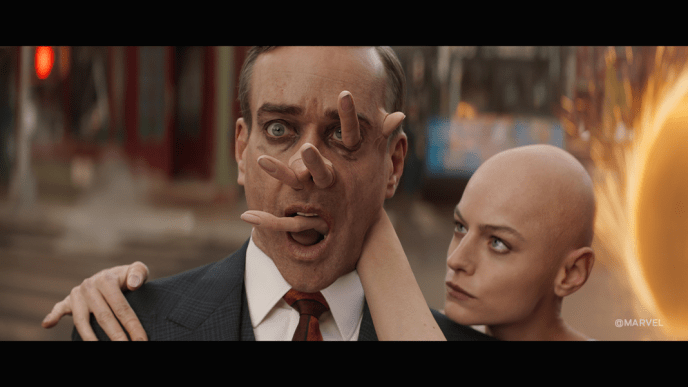
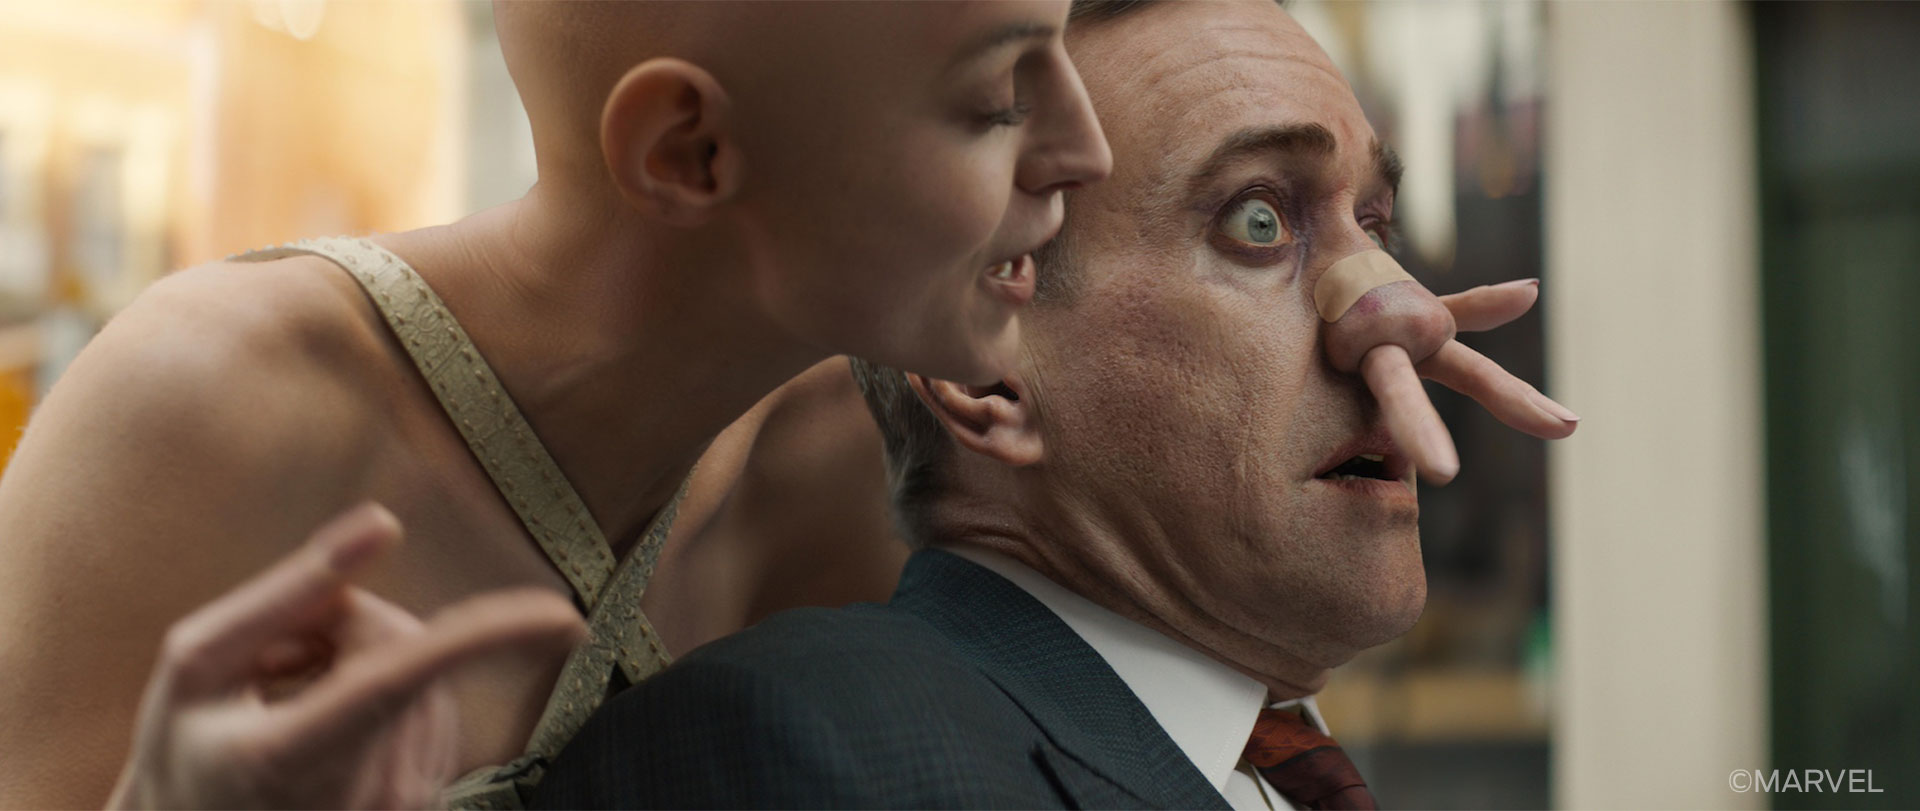
On-set, the plate with and without the actors was filmed - each time with one version where Matthew Macfadyen is performing as if Cassandra’s fingers are really sliding under his skin but without her in frame. Then another version in which Emma Corrin is also performing, pretending as if their hand is really under Matthew’s skin and deforming his face with their hand. Their performances were the key visual components that guided our teams and gave valuable cues for animation later on how to achieve the desired results.
In order to get the best possible out-turn, good planning when and what we were showing to our clients was crucial. Because the effect was so complex, we wanted to get the big performance decisions signed off as early as possible so we could focus on the subsequent steps, knowing that most likely there won’t be big changes that might be destructive by invalidating previous work steps. This meant that we spent a lot of energy in rigging with Axel Landa Medina to ensure that what the animation team sees in their viewports will reflect as closely as possible the key deformation we wanted to achieve based on the performances from both Emma and Matthew. This way, we could also give our animation team, supervised by Jye Skinn and led by Mohammad Sa’deh, the creative liberty to find the most appealing hand poses once the fingers are under the skin as what they saw in Maya would already be a valid representation of the base deformation and its primary volumes.
To be as faithful as we can to the work from the actors, the animation team went into the shots after the initial body / head tracks were done, and very carefully matched the plate performances from Matthew almost frame by frame. In order for the team to be able to do that we needed two things: An excellent static asset that matched Matthew down to the pore level and an excellent dynamic asset that can match all intricacies of Matthew’s facial performance, as well as a perfect replica of Cassandra’s hand and lower arm.
So we knew from the get go that we would have to create extremely high quality assets. Using 2D techniques in the areas where Cassandra’s fingers were not dynamically deforming the face would be quite difficult and to believably merge together the plate footage with the renders, would necessitate perfect tracks and lighting matches on top. Of course, we did not want to discard this option and certainly utilized it also for the neck area. However,we really wanted to be prepared to use the full CG face and the digital hand if necessary, as this provided the greatest creative freedom for the client.
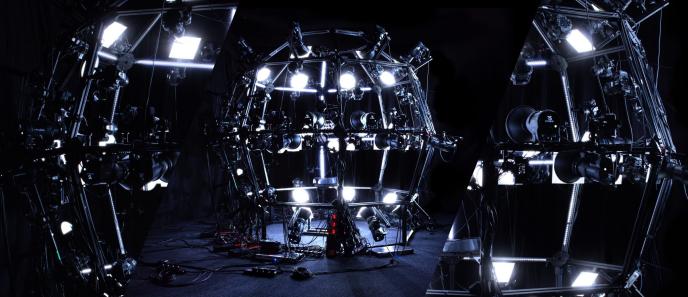
The cost for this was that we needed to really have a perfect digital version especially of Paradox’s head, both as a static asset and in motion. This was achieved using a high-end FACS based setup, informed by ClearAngle’s Dorothy scans and further skillfully refined by Jose Pericles in modelling, following initial work from Mabel John. On the lookdev and texture side, we benefited further from the Dorothy dataset, with Jin Ji handling the look development. Together with the texture artists Natalia Sudas and Miguel Florez they created an asset that could stand up even to extreme close-ups. David Nielsen’s grooming work accurately captured all the nuances of Matthew’s eyebrows and overall groom.
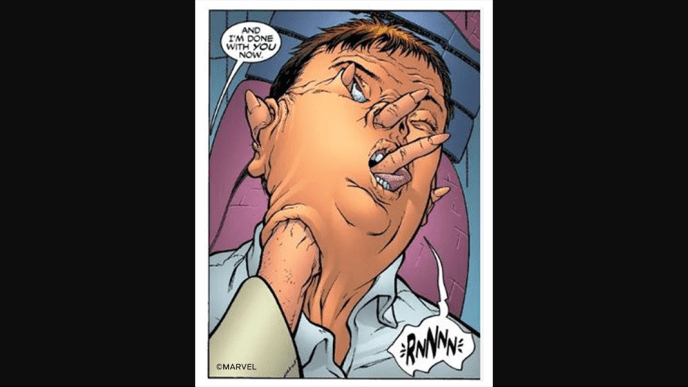
While we began building the DigiDouble and continued refining Cassandra’s hand deformation with a PSD shape setup, we also leveraged our VisDev team to explore more what the final visual output should look like. Guided by the client’s preferred reference from both the comic book and photo collages, our visDev team worked on top of early renders with a WIP version of the head asset along with a rough 3D prototype setup of the hand deforming the face. This 2D / 3D hybrid concepting approach allowed for quick iterations and proved highly efficient if you have great artists that can paint by hand and make it look extremely realistic. We presented the resulting versions of a sequence of the hand interacting with Matthew’s face to Matt Twyford, and after he approved one of the versions, we moved forward with the technical implementation. Our goal was to ensure a high-quality result that maintained consistency across all shots while delivering in a timely manner.
As briefly mentioned above, in order to be efficient and despite the complexity of the 3D hand-face interaction, we knew we needed to build a rigging setup that would give the animation team - and subsequently our client - a very clear representation of what the primary face deformation would look like. This would allow for sign off on the core performance before we would initiate the other stages. This step was very important, because rerunning the whole setup through all stages would be likely conflicting with the production timelines. The goal here was to be able to tell everyone that everything after this specific first milestone would be “only” enhancing the look, but not alter the key beats or overall visual impression.
In terms of technical implementation, after testing a few options, the final choice was a cMuscle setup proposed by Tom Ferstl, as it provided many of the features we needed right out of the box. The surface curvature of the head is quite varied in certain areas. In order to provide stable results, even in regions like the nose, where there is a steep angle change between the malar fat pad and the nose itself, we could rely on some of the functionality of the cMuscleDirection nodes to be able to control the directionality of the collisions between the hand and the face. Additionally, the smooth and relax attributes were very useful. We layered the setup, connecting the layers via multiple Framestore proprietary wrap nodes, in order to differentiate between the various areas of the face like the forehead, mouth, etc. and allow specific control over their varying deformation requirements.
In order to limit the effect to only the areas where Cassandra’s hand is in contact with, we used another Framestore proprietary node that calculates the distance between the face and the hand, and outputs a mask that we can use to drive envelopes. This allowed for animation, via their plate-informed initial performance match of Emma’s hand actions, to drive the core of the skin effect.
A few extra controls were added on top, for example one that allowed the animators to erase the effect where they didn't need it, providing an extra level of granularity beyond the automated, distance-driven behaviour. This was complemented by the more common extra tweaker controls, in the nose and eye areas among others, where even small adjustments in the millimetre range can have a huge impact .
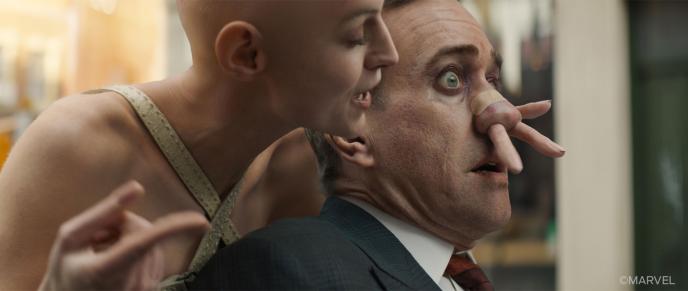
All of these deformations had to work with the underlying face setup, which-like most setups at Framestore - consists of primarily a shape driven network. To ensure the expected results and avoid unwanted surprises, this setup came first in the stack, before the collision setup mentioned above got computed.
Another critical component of the final quality of the effect, was the FX layer which came after the animation cache that utilised the rigging setup. The FX work added crucial visual complexity, helping to mimic lifelike skin behaviour. We chose not to use CFX on this occasion, with the goal to not add too many different teams and tools to the process, and instead we went straight to FX and Houdini as the next key part of the deformation pipe. Like in rigging, we had mainly one principal artist, Lucas Stringhetti, responsible for most of the development work of that portion of the effect, with Nicolas Sauval, being the team’s lead overlooking and helping to progress the work.
With the aforementioned approved visDev reference in mind, we defined the secondary and tertiary deformation layers. The core assumption for FX was that everything coming out of the animation cache should stay consistent in terms of the bigger volumes, with FX tasked with adding visual interest and complexity. The outcome were five different setups - each tailored to solve a specific problem and often regionally constrained to a certain area of the face. For the skin behaviour, we defined three form hierarchies, going from the big to the small. We labelled them folds, wrinkle and fine wrinkle setups. Additionally, there was a muscle setup using Vellum Softbody Sims, for example for the lips, as well as a setup that allowed for a different behaviour when the fingers were meant to exit the skin - this was particularly important as sometimes the creative brief entailed the fingers diving under the skin only to exit again through previously non existing openings. The collision setup was necessary to ensure that the lips retained their volumes as defined in the neutral head pose. Artificially thinning the lips would have looked unnatural and likely negatively impacted the desired realism, by compromising the notion that underneath the skin are working anatomical structures like fat and bone. This was rounded off by weighting the effect in such a way to ensure that the upper lip would always be protruding slightly more in profile than the lower lip which again helped the look and appeal. Lastly, for performance-critical elements like the eyes, we added additional controls in the rig to avoid relying solely on the simulation output, as even minor adjustments of a few millimetres could significantly impact the performance.
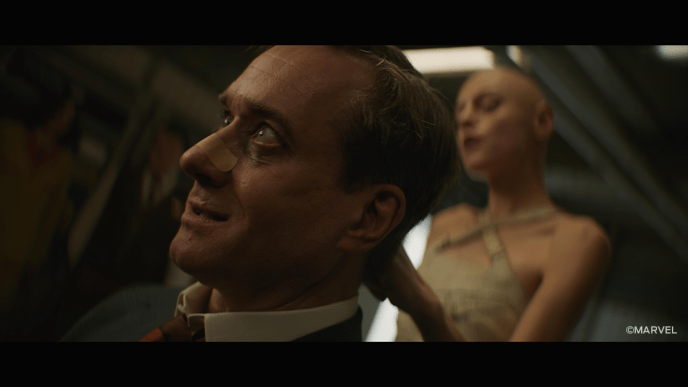
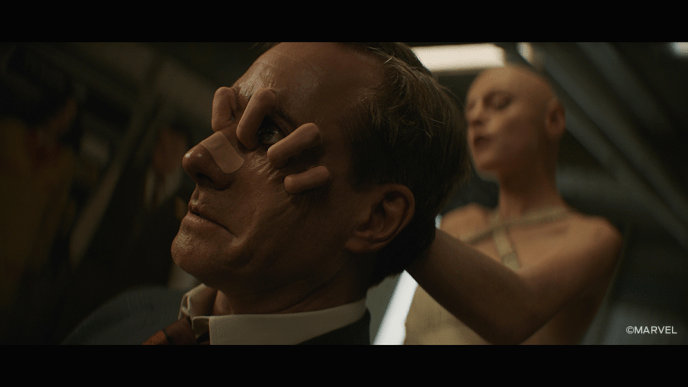
Thanks to the skill of the FX team, the great foundational work done in rigging and of course animation and the rest of the asset team in modelling, texturing and lookdev as well as groom, we ended up with a highly polished cache after these steps were completed.
The last piece of the puzzle that we used to refine the final frames from a 3D point of view was a shotsculpt pass. This was utilised to either enhance folds that already existed from the prior sims or to add more definition to Cassandra’s hand and make the fingers or nails read better under the skin. Pierre Edouard-Merien was tasked with exploring the best workflows in shotsculpt, as well the viability of adding the last missing pieces to the other department’s deformation work i.e. how far to push things in FX versus solving it hands on with the sculpt pass. We also enhanced the bony landmarks, such as the knuckles or the metacarpals where needed, which helped reinforce the feeling we were going for during the planning phase. For the whole process, we used Mush, which has a number of very handy features (no pun intended :)) One of them being the ability to sculpt and reuse reference meshes that can be used as clone sources and stored as poses in a library. This ensures consistency across shots and artists, as well as faster turnaround times.
This brief overview only scratches the surface, to be honest, and doesn’t fully capture the immense efforts and hard work of the entire asset and production teams. On the shot side, Taylor Lenton, as CG Supervisor, among many other things, ensured together with the shot centric teams that what we achieved in our principal dev shots was carried forward to all subsequent shots and sequences.
We could write more about the detail oriented fine-tuning that was done in lookdev for tricky areas, such as the limbus in the eyes, the dynamic meniscus (complicated by the sometimes extreme stretch of the eyelids based on the finger deformations), the dynamic blood flow setup, and much more. However, hopefully it still gives an idea of the thought process and partial implementation of the work of the many artists, supervisors and production crew involved in bringing this part of the film to life.
Markus Schmidt, Global Head of Creature Development
